What Aircraft Tools
Do You Need for
Your Kitplane?
As I've been building my airplane, several
aircraft tools have proven invaluable. Here's my take on the most
critical of those tools.
Pneumatic
Hand Squeezer
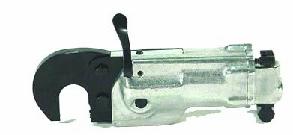 Buy a
pneumatic hand
squeezer. I bought
a used one. There
are so many rivets
in my kit that this is an aircraft tool that has
paid for itself 100 times over. And
as a
bonus, I can set up the pneumatic to do the big line of rivets, then
when
something strange comes up I can set up my hand squeezer for the one
rivet
without messing up the setup on the pneumatic. While
you are at it, get the adjustable set holder. You can adjust
the depth of the holder by twisting, letting you quickly set the
squeezer to fit the rivet you are working on. You no longer
need to use a stack of spacers. Buy a
pneumatic hand
squeezer. I bought
a used one. There
are so many rivets
in my kit that this is an aircraft tool that has
paid for itself 100 times over. And
as a
bonus, I can set up the pneumatic to do the big line of rivets, then
when
something strange comes up I can set up my hand squeezer for the one
rivet
without messing up the setup on the pneumatic. While
you are at it, get the adjustable set holder. You can adjust
the depth of the holder by twisting, letting you quickly set the
squeezer to fit the rivet you are working on. You no longer
need to use a stack of spacers.
Do you want to see what other readers have said about tools, or to
offer your own story about your Best Kit Plane Tool, or just to ask
questions about tools? If so, click
here. Otherewise, keep reading about the tools I
found most invaluable. You'll get to the reader discussion on tools at the end.
Storage
Buy
a tray with multiple compartments to put all
the hardware from the bags into. I
tried
keeping everything in the original bags, and this ended up wasting a
lot of
time as I would hunt for one nut or bolt.
So I bought a storage tray like this Akro-Mils
Gray 16 Drawer Plastic Cabinet (left). It was
too small, not enough drawers. I ended up filling the whole
thing with just
rivets, so I bought a second one. You'll need either two of
this size, or one larger one like this
Modular
Small Parts Storage Cabinet (below),
whichever works best for
you and your workspace.
If I was starting over, I would just buy one of the large ones. (below),
whichever works best for
you and your workspace.
If I was starting over, I would just buy one of the large ones.
I put each size/type of nut and bolt
in
a separate
tray. That way, the
2 AN3-4 bolts from one bag and
the 4 AN3-4 bolts from another bag would all go in the same tray.
Put
each type of rivet in it’s own tray, and
have these trays removable so you can bring it to the work. Climbing in and out to get
another rivet gets
old.
 One addition
to your
kit of
aircraft tools should be an extra
tip
for your soldering iron One addition
to your
kit of
aircraft tools should be an extra
tip
for your soldering iron . Round
the edges so there are no sharp
corners. Use this
tip to remove the
protective coating on the skins before you do the chemical work and
rivet. The hot iron
will melt a little line in the
plastic, and it will peel off . Round
the edges so there are no sharp
corners. Use this
tip to remove the
protective coating on the skins before you do the chemical work and
rivet. The hot iron
will melt a little line in the
plastic, and it will peel off 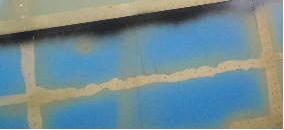 real neat,
not all messy like mine. Tips are cheap
enough to have one for just the plastic and another for the electrical
work. real neat,
not all messy like mine. Tips are cheap
enough to have one for just the plastic and another for the electrical
work.
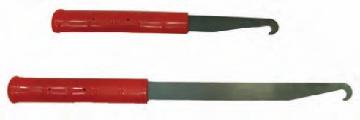 These
are
very useful. Eventually,
you will have to drill a hole through some
pieces that are
riveted or bolted together. You
won’t be
able to pull them apart to get to the small aluminum chips left
in-between. That’s
where the chip chaser
comes in. Because
it is so thin, you can
slide it between the parts past the chips.
Then, using the hook at the end, pull the
chips out. As
an
added bonus, they
are great for getting
the washer into the thin area between parts, like on the hinge pins for
the
ailerons. If you're building an aluminum skinned airplane, a
chip
chaser is an invaluable addition to your aircraft tools kit. These
are
very useful. Eventually,
you will have to drill a hole through some
pieces that are
riveted or bolted together. You
won’t be
able to pull them apart to get to the small aluminum chips left
in-between. That’s
where the chip chaser
comes in. Because
it is so thin, you can
slide it between the parts past the chips.
Then, using the hook at the end, pull the
chips out. As
an
added bonus, they
are great for getting
the washer into the thin area between parts, like on the hinge pins for
the
ailerons. If you're building an aluminum skinned airplane, a
chip
chaser is an invaluable addition to your aircraft tools kit.
Platenut
Jigs
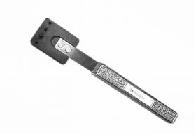 You
can manage to build the entire airplane
without these in your bag of aircraft tools, but it’s a lot harder. These make drilling the
attachment holes for platenuts
quick and
easy. After you
have drilled the main
hole that the screw will go through, you insert the large pin of the
jig into
it. Then drill the
first rivet
hole. Flip the jig
over, insert the main
and rivet pegs into the two holes you now have, and drill the second
rivet
hole. This
gives you an exact fit every
time. You will need
one jig for each
size platenut. You
can manage to build the entire airplane
without these in your bag of aircraft tools, but it’s a lot harder. These make drilling the
attachment holes for platenuts
quick and
easy. After you
have drilled the main
hole that the screw will go through, you insert the large pin of the
jig into
it. Then drill the
first rivet
hole. Flip the jig
over, insert the main
and rivet pegs into the two holes you now have, and drill the second
rivet
hole. This
gives you an exact fit every
time. You will need
one jig for each
size platenut.
Wire
Strippers
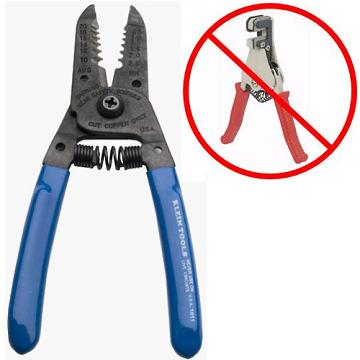 I
tried one of the fancy one handed strippers that are supposed to pull
the coating off the wire. I found that on the small wires I
was dealing with, it kept pulling strands of wire with it, so I gave up
on it and went back to my trusty older set like this Klein
1011 Wire Stripper Cutter. This is one of my most
well used aircraft tools. I
tried one of the fancy one handed strippers that are supposed to pull
the coating off the wire. I found that on the small wires I
was dealing with, it kept pulling strands of wire with it, so I gave up
on it and went back to my trusty older set like this Klein
1011 Wire Stripper Cutter. This is one of my most
well used aircraft tools.
Crimpers
I
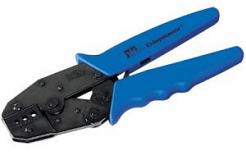
took the advice from Light Plane Mechanic’s comparison of crimpers and
bought the Ideal Crimpmaster crimpers. I bought three items:
- The
Ideal
Crimpmaster - Crimp tool
 pictured,
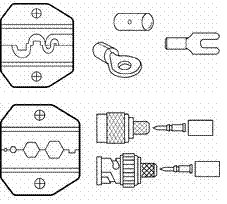
which comes with die set for RG-58 (coax for
antennas), pictured,
which comes with die set for RG-58 (coax for
antennas),
- The
Ideal
Crimpmaster Die Set, For 22-10 AWG
 (90%
of
all crimping), and (90%
of
all crimping), and
- The
Paladin
2031 22-8 AWG Non-Insulated Terminal Die Set
 , which fits
in the Ideal crimp tool
(for large wires such as main power). , which fits
in the Ideal crimp tool
(for large wires such as main power).
 I
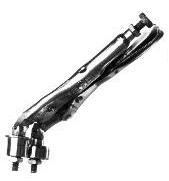
have tried both the round tool and
the tool that looks
like a small pair of vice grips, and have had better luck with the
later. The two
rollers are shaped to give you the
proper bend at the proper space from the edge of the skin. They are adjustable to the
thickness of the
skin being worked. Although
you can use
a break for the few straight skin edges, this tool is a lot cheaper,
and works
for all the edges. I
have tried both the round tool and
the tool that looks
like a small pair of vice grips, and have had better luck with the
later. The two
rollers are shaped to give you the
proper bend at the proper space from the edge of the skin. They are adjustable to the
thickness of the
skin being worked. Although
you can use
a break for the few straight skin edges, this tool is a lot cheaper,
and works
for all the edges.
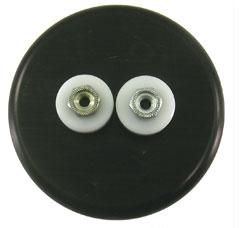 It only took a
few test pulls to
figure it out. At
first I had the tool set too tight, and it
wouldn’t roll. This
isn’t necessary, as
the shape of the rollers does all the work.
The only other thing to pay attention to is
that the tool
doesn’t roll
off the edge as you work your way along.
There is a lip on the rollers.
Just keep that lip up against the edge of the
skin and it
works great. Add the edge roller that looks like a vice grips
to your aircraft tools. It only took a
few test pulls to
figure it out. At
first I had the tool set too tight, and it
wouldn’t roll. This
isn’t necessary, as
the shape of the rollers does all the work.
The only other thing to pay attention to is
that the tool
doesn’t roll
off the edge as you work your way along.
There is a lip on the rollers.
Just keep that lip up against the edge of the
skin and it
works great. Add the edge roller that looks like a vice grips
to your aircraft tools.
Table
mounted Dimpling Tool
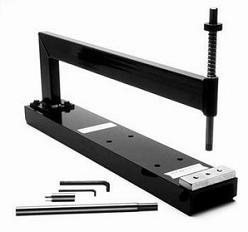 These
make quick work of the interior
holes in the
skins. They use the
same dimple dies as
the hand held dimplers. These
make quick work of the interior
holes in the
skins. They use the
same dimple dies as
the hand held dimplers.
I have seen pictures of
benches with
a cutout to recess the
tool, making the top of the bottom dimple die flush with the top of the
bench. This keeps
the skin flat when dimpling, and
prevents little smiley faces. I
found
that the top of the dimple die sat the same height as a 2x4 with a
piece of padding
taped to it. So I
just set the tool on
the bench, and put a 2x4 on either side to keep the skin flat.
You will also need a tube bender in your aircraft tools so you can bend
the various aluminum
tubing of your kitplane. I
have used several of
both of these first two types of tube benders, and prefer the one on
the left with two handles. I
have seen some of the cheaper benders of
both types where the grooves in the two halves of the tool don’t line
up, leaving a gouge or dent in the bent tube.
When you buy your tool, make sure the halves match.
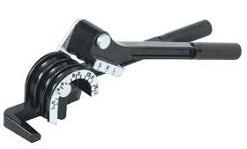  I recommend
this two-handled type
Pro-Grade
Hand Tube & Pipe Bender.
I don't recommend this
type of one-handled tube bender.
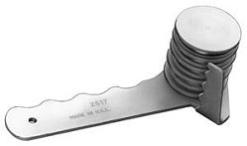
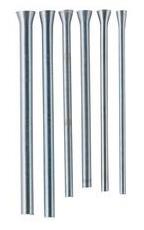 I
have never tried this kind of tube bender, so I can't recommend or not
recommend. This is a set of springs. You insert
tubes of
different diameters into the matching diameter spring, and then you
bend the tube that is inside the spring. The spring keeps the
tube from kinking while you bend it. I
have never tried this kind of tube bender, so I can't recommend or not
recommend. This is a set of springs. You insert
tubes of
different diameters into the matching diameter spring, and then you
bend the tube that is inside the spring. The spring keeps the
tube from kinking while you bend it.
If you've had any experience with this type of tube bender, please contact
me and let me know. Once I've received a definitive
amount of feedback one way or another I'll post some results here.
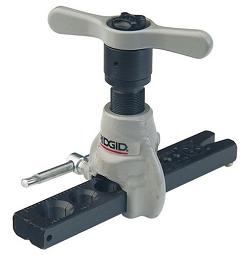  This
is one of those aircraft tools that is a good
candidate for sharing. You
will only be using
this tool to flare
your fuel and brake lines and possibly your pitot/static lines. Then you will not need it
again. (See
how I did mine here) It isn’t
cheap either. Don’t
be fooled by the ones you can get at
Autozone, they are the wrong angle.
Automotive
tubes are flared to 45° not the 37°
used for aircraft fittings. Ask
around at the airport before you buy this
one. Someone in the
local EAA chapter may
already own one, and will probably lend it to you. This
is one of those aircraft tools that is a good
candidate for sharing. You
will only be using
this tool to flare
your fuel and brake lines and possibly your pitot/static lines. Then you will not need it
again. (See
how I did mine here) It isn’t
cheap either. Don’t
be fooled by the ones you can get at
Autozone, they are the wrong angle.
Automotive
tubes are flared to 45° not the 37°
used for aircraft fittings. Ask
around at the airport before you buy this
one. Someone in the
local EAA chapter may
already own one, and will probably lend it to you.
If your EAA chapter, or
your builder's group is ready to get a tube flaring tool, I recommend
this one, the Ridgid 41162 3/16" - 3/4" ratchet flaring
tool no. 377.
It looks different than the type you've seen me use in the
pictures. My EAA Chapter didn't have one like this.
But, I've checked this one out. It's 37°,
really nice.
Tell Us About Your Best Kit Plane Tool
Tell us about your favorite tool -- that special tool you found invaluable. Where did you get it? How did it solve a special problem, or save you time and effort? Did you make a special tool?
Or, if you want to ask a question about Kit Plane Tools not already addressed here, please do so.
I will respond to all entries.
Return
from Aircraft Tools
Needed to Tools
and Tips
Return from Aircraft Tools Needed
to Kit Plane Advice Home
|


