
Preparing Aluminum PartsThese tips for measuring, cleaning, and preparing the aluminum parts of your kitplane will really pay off in saved time, effort, and frustration. Edge Distance
This is a very important step. Don’t get in such a hurry that you skip it. By dressing all the edges of your aluminum parts, you remove any stress points and ensure proper fit. Stress will build any place that there is an imperfection. The cutting process used by Vans leaves little burrs or sharp edges on most pieces, and leaves little tabs on the thicker parts. All of these imperfections need to be removed. A good rule of thumb is to run your fingernail along the edge of a part. If you can feel the bumps, you need to do more edge dressing. Don’t forget about the inside of lightening holes, they need de-burring too. I used a burnishing tool, or edge de-burring tool, at first. But I wasn’t real happy with the results, so now I start with a file if there are heavy burrs, and finish up with emery cloth. As an alternative, smaller parts are easy to edge dress using a Scotchbrite polishing wheel mounted in a bench grinder. PrimingPrime everything! I
have spent enough time doing corrosion control work on airplanes, thank
you. A lot of
builders don’t prime their
aluminum parts, they just alodine them.
Do
you
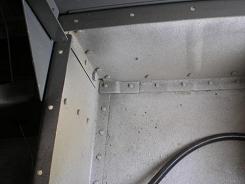
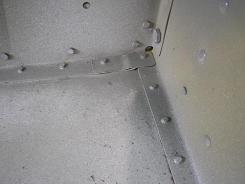
really want to take the chance that your plane will rot away? If you live in I used 3M Alumiprep as the first step. This is the acid etch process. It will remove any grease, oil and dirt from the part. Don’t go touching the parts after you clean them. Make sure you are wearing gloves to both protect your hands and to keep your hand oil off the parts. All you do is mix a little Alumiprep with water, then wash the parts like you do dishes at home. Get the bubbles going and clean them well. The writing on a lot of the parts will come off on this step. This will help you know you’ve done a good job. Rinse the parts with water, and let them dry. They should now be dull instead of shiny. Next I alodined the parts. This is the step that turns the aluminum parts gold. Actually, the gold color comes from a dye that is added -- it has nothing to do with the chemical reaction. It is added only so you can see the progress. As the alodine gets older, the dye doesn’t work as well. Follow the directions for how long to leave it on the parts, don’t rely only on the color. You can completely immerse parts in the alodine, or use a spray bottle to spray the larger parts. After the required time, rinse with water and let dry. Depending on the exact aluminum makeup of the parts, some will end up more gold than others. Last is the primer. I used Dupont’s Veri-prime (primer #615 and converter #616S) because it was the easiest to get locally for me. Probably any brand-name two-part epoxy primer is just as good. Prime everything. Did I say that already? Don’t forget the dimples on the outside of the skins. Those need priming too. Most of the corrosion work I have had to do is around rivets. The dissimilar metal and the fact that the rivet hole cuts through the alclad probably contribute to the faster corrosion in this area. You can see the primer stripes on my parts in my pictures. I’m not worried about the skin around the dimples; I will treat that when I get to painting the outside of the plane.
Return from Aluminum Parts to Tools and Tips Return from Aluminum Parts to Kit Plane Advice Home |
 I
found a couple of
times that after I had drilled the holes through
the skin and into the supporting structure that the holes in the
supporting structure didn’t have the required edge distance.
The
biggest spot this happened was after I set the center spar sections of
the fuselage to match the distance between the wing spars.
The flanges
on the seat and baggage ribs weren’t long enough to give me edge
distance on the outside two rivets.
  If
this happens to you,
it isn’t the end of the world. Of course, if it is easy to
make new
aluminum parts and swap them out, you can do that. But if you
can’t
easily replace a part, you can add a doubler. Use a scrap
piece of
aluminum that is
at least as thick as the piece without edge distance. Make
the doubler
extend to the rivet holes on either side of the questionable
hole.
Then when you rivet it all together, include the doubler on those three
holes and you are good.