Empennage Fiberglass
 For the
empennage fiberglass, I needed to
do stabilizer and control tips, then the rudder bottom.
Careful sanding generally got everything to
fit together nicely. There
were a few
spots that needed extra attention.
Here’s how I did it.
Stab and
control tips
I started the empennage
fiberglass work with the tips for
the stabs. First
thing I had to do was
get the tip to slip into the stab.
I had
to sand the end at a few spots to prevent the tip from bottoming out
inside the
stab before the lip was tight to the bevel.
I also had to do a little fine sanding with a
file where the bevel had
gotten rounded over or where resin had dripped.
Once the tip would fit properly into the stab,
I drilled the holes and
clecoed it into position.
I repeated this process
for the control tips. The
rudder top was a little different, as
there is no front that needs to be made, but the fitting and drilling
process
was the same.
Don’t forget to make the
metal backing strips and fiberglass
them onto the tips while you are busy making a mess.
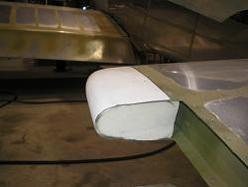 To fill the ends, I cut
out some foam to use as a block for
the new fiberglass. This
is the cheap
insulation type of foam you can get at any of the big box hardware
stores in 4 ft
x 8 ft sheets. I
cut them to fit snug
about 1/8 inch inside the tip. Then
I
laid up a couple of layers of fiberglass on both the inside and outside
of the
foam. After that
dried, I sanded
everything enough to fit back on the stabs and controls. To fill the ends, I cut
out some foam to use as a block for
the new fiberglass. This
is the cheap
insulation type of foam you can get at any of the big box hardware
stores in 4 ft
x 8 ft sheets. I
cut them to fit snug
about 1/8 inch inside the tip. Then
I
laid up a couple of layers of fiberglass on both the inside and outside
of the
foam. After that
dried, I sanded
everything enough to fit back on the stabs and controls.
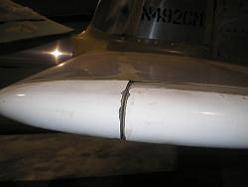 With the tips clecoed
into position, I spent some time
sanding the ends of both until I was happy with the fit between them. I wanted a small, uniform
gap that allowed
the control to travel without hitting the stab.
(Remember to leave room for the paint.) With the tips clecoed
into position, I spent some time
sanding the ends of both until I was happy with the fit between them. I wanted a small, uniform
gap that allowed
the control to travel without hitting the stab.
(Remember to leave room for the paint.)
I had a few areas that I
had to sand through the cloth I had
laid up. Not to
worry, I fixed them a
little later.
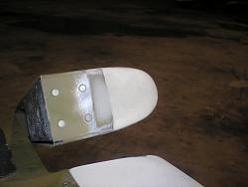 Once I had the shape
finished, I riveted the tips into
place. Next I
masked off the stab and
controls about 1 inch down on the metal.
Here is where I fixed those holes I made
earlier. I removed
enough extra material to allow a
small patch of resin and cloth or micro balloons.
Then I filled all the holes, and also any
spots along the metal to fiberglass seam that I wasn’t happy with. Some sanding with a
sanding block brought
everything flush with the metal and gave me a good fit. Once I had the shape
finished, I riveted the tips into
place. Next I
masked off the stab and
controls about 1 inch down on the metal.
Here is where I fixed those holes I made
earlier. I removed
enough extra material to allow a
small patch of resin and cloth or micro balloons.
Then I filled all the holes, and also any
spots along the metal to fiberglass seam that I wasn’t happy with. Some sanding with a
sanding block brought
everything flush with the metal and gave me a good fit.
Rudder
Bottom
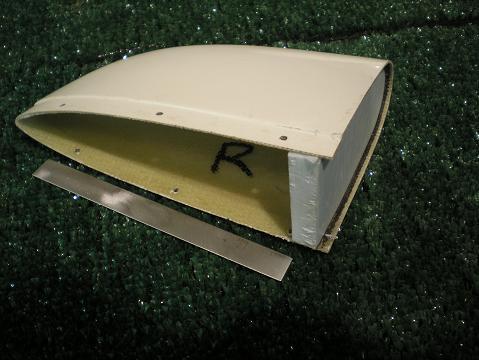
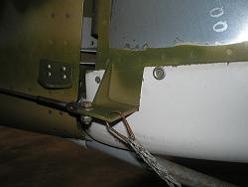 The last part of the empennage fiberglass I did was the rudder bottom. I started by making a template for the
control horn out of poster board.
Then I
transferred it to the fiberglass and made the cutout.
Initially all I removed was the U shaped
channel for the horn itself. Later
I
discovered that the top portion interfered with the stab mounting bolt
heads,
so I ended up removing that portion too. The last part of the empennage fiberglass I did was the rudder bottom. I started by making a template for the
control horn out of poster board.
Then I
transferred it to the fiberglass and made the cutout.
Initially all I removed was the U shaped
channel for the horn itself. Later
I
discovered that the top portion interfered with the stab mounting bolt
heads,
so I ended up removing that portion too.
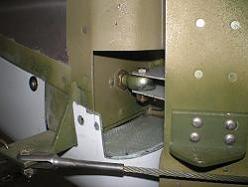 I didn’t like the idea
that air could travel in the end of
the cap and bounce around inside the bottom of the rudder. So I added a small piece
of foam and a couple
layers of fiberglass to the front inside of the cap.
It fits just under the control horn and so
closes off the front of the cap. I didn’t like the idea
that air could travel in the end of
the cap and bounce around inside the bottom of the rudder. So I added a small piece
of foam and a couple
layers of fiberglass to the front inside of the cap.
It fits just under the control horn and so
closes off the front of the cap.
Fitting the cap onto the
bottom of the rudder was a little
tricky. I had to
get it started over the
horn, and slide it up until it was almost touching the metal lip. Then I inserted the aft
end and worked my way
forward until it fit all the way on.
I opted to install the cap with screws and
platenuts. This
lets me remove the cap
if I need to do any work on the taillight.
I also installed a two-wire connection so the
light can be disconnected
and the cap completely removed.
Return from
Empennage
Fiberglass to Tail
Kit, or to Fiberglass
Return from Empennage Fiberglass
to Kit Plane Advice Home
|


 To fill the ends, I cut
out some foam to use as a block for
the new fiberglass.
 With the tips clecoed
into position, I spent some time
sanding the ends of both until I was happy with the fit between them.
 Once I had the shape
finished, I riveted the tips into
place.
 The last part of the empennage fiberglass I did was the rudder bottom. I started by making a template for the
control horn out of poster board.
 I didn’t like the idea
that air could travel in the end of
the cap and bounce around inside the bottom of the rudder.