
Fiberglass TipsWorking with fiberglass is not among my favorite activities. But these fiberglass tips and techniques helped me out as I went along, and may also help you shorten and simplify the fiberglass phase of your build. I used electrical tape and duct tape to do the masking. The fiberglass resin won’t stick to them. I wanted a fine line around the plexiglass bubble where it met the fiberglass. So I used two layers of electric tape, one on top of the other. I used an aggressive sand paper until I got to the first layer, then I switched to a finer grit until the second layer was gone. When everything was removed it left a small lip, the thickness of one layer of electric tape, at the edge of the fiberglass. Mask off everything! The fiberglass resin will get anywhere you don’t mask. This fiberglass tip saved me loads of rework time. I found that several of the fiberglass pieces didn’t fit exactly the way I wanted. Also, when the tip arrived there was a spot about 10 inches across where it dimpled in. I could push it back out, but as soon as I let go it would pop back in. So I used a heat gun and fixed it. I put on my welding gloves (any thick leather gloves will do) to allow me to handle the fiberglass when it got really hot, then I pointed a heat gun at the offending spot. Once the fiberglass was hot and pliable, I pushed it into shape and held it until it cooled in the new position. This took several shots, reheating at slightly different locations until I had the total shape I wanted. Don’t be in a hurry with this process. If you try to bend the fiberglass into shape before it is hot and pliable, it may crack or break. I heated the fiberglass until it got sticky and I could easily move it around with gloved hands. Then I turned the gun off and worked the part into shape. The hardest part was holding the piece in shape until it cooled enough to no longer be pliable. Wait until you are ready to paint before making a lot of final touches. You can spend a lot of time and the project can easily get bogged down. I made the parts structurally sound. But I didn’t spend any time making them pretty. I have seen lots of planes that weren’t painted yet, but the fiberglass was immaculate. I think this is a little bit of wasted effort. You will have to go back and work the parts before painting anyway. So my though is to just wait until I am ready to paint to do the final touches on the fiberglass. For example: I have the canopy skirt made. It fits well, and is structurally sound. I can go fly with it as it is. But it does need more work before painting. I still need to smooth out the edges where it meets the plexiglass, and there are still several pin holes that need filling. Also, the trailing edge needs a little work to get it to the perfect shape. After I have flown, and am satisfied that no modifications need to be made, I will tackle the finishing touches. I will start at the front and work my way to the aft end of the plane, cleaning things up and prepping for paint. I
had always heard that I
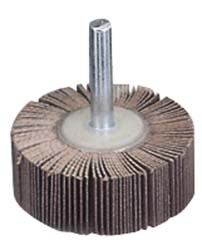
needed to use a flap wheel to
sand the edges of fiberglass into shape.
 Flap Wheel
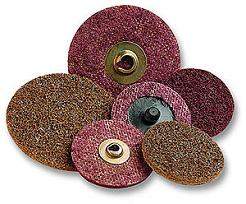
 Scotch-Brite Discs Scotch-Brite Discs
I tried it, but I found Scotch-Brite discs
worked a lot better. The
fiberglass is hard on the Scotch-Brite,
and I went through several pads, but it was quick, and gave good
results.
I think you'll find that the fiberglass tips on this page will help your build to go faster and smoother. Return from Fiberglass Tips to Tools and Tips or to Fiberglass Return from Fiberglass Tips to Kit Plane Advice Home |