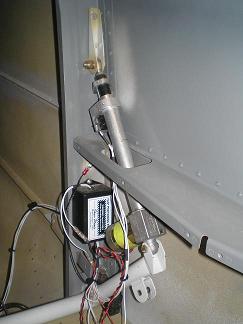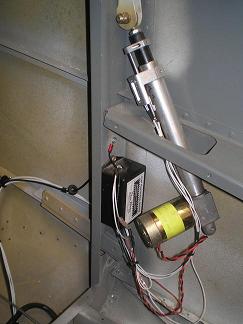

Flap SystemI installed Vans Flap System in my RV-8 to control the flap motor. It lets me hit the switch to move the flaps to the desired position instead of having to hold the switch down the entire time. The tips here will be useful to other RV builders and others installing electric flaps.
In the older kits, we had to drill the holes in the floor for the bottom of the F-876 aft cabin covers. I wanted to ensure there would be no interference with the flap motor as it traveled full up and down. So I taped a piece of 1/8” thick aluminum to the farthest inboard spot on the motor. Then I set the F-876-L into position and clecoed the top holes. I could then push the bottom of the F-876-L in or out as required until there was no interference with the motor. Then when I removed the 1/8” spacer, I knew I had at least that much clearance between the motor and the F-876-L. It looks like the new, match drilled kits have the holes in the floors already drilled. Before you install the platenuts, you should check to ensure your motor clears the F-876-L. It would be easy to move the holes a little if required. I ran the wires under the floor, through the F-807 bulkhead, then under the baggage compartment and back forward through the F-807 bulkhead. I cut a slot in the F-834B-L baggage floor so I can slide a rubber grommet in place to keep the wire from chaffing. I suppose the wire could be run up through the floor underneath the flap system motor, and the same kind of slot and grommet used when the floor is installed.
Return from Flap System to Electrical System Return from Flap System to Kit Plane Advice Home |
 I
initially fit the flap motor without the wings on. I had just
the
WD-806 Flap Actuator Weldment installed. This let me move the
motor full length up and down. Later, after the wings and
flaps
were installed, I only had to adjust the up and down stops.
 I ran it
up or down until I could tell it was going to
scrape, then I stopped. I had to pull the motor out, and
grind
more off of the F-806C-L. I figured the time I spent
grinding,
filing and smoothing allowed the motor to cool.