
Front Control Stick
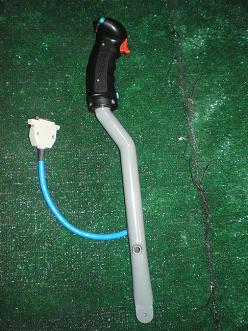
The two big changes most of us make are bending the stick (if you are going to), and adding some sort of stick grip. Here is what I did for both. Bending
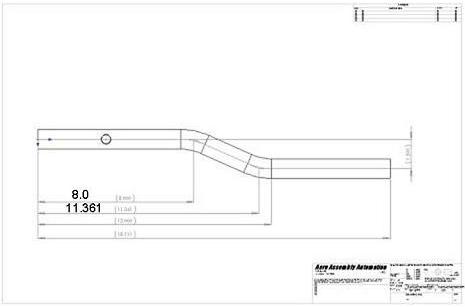
the Stick The choice to bend or not is another one of those personal things that make building your own airplane so much fun—you can customize it to fit you perfectly. I have read and talked to a few builders who decided to keep theirs unbent. If this fits for you, perfect. Because I have shorter arms, I wanted the stick grip a little farther aft than it would be unbent. Yes, this makes the grip pretty close to my stomach when full aft, but the normal, level flight position is comfortable. In the past, a lot of guys sent their front control stick off to a guy who specialized in this kind of bending, but that service is no longer available. The dimensions are available, though, so I used them as a starting point to bend my stick to the shape I wanted.
Original recommended bending dimensions I live in a small town in
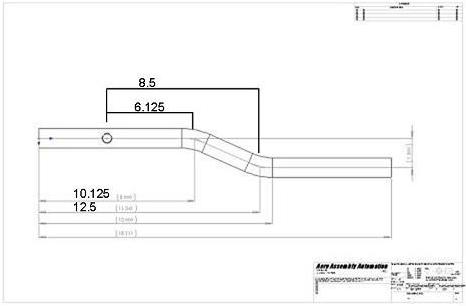
I used the ruined stick as a template to get the correct positions for the cuts. I found that the dimensions for the original bending weren’t perfect for me. The bottom bend was a little too low and caused the stick to hit the seat before full aft was achieved. So I moved the bend up a little. I added my final dimensions to this diagram.
My bending dimensions I made two cuts almost all the way through the stick, one for each of the two bends. Then I bent the stick in both places ensuring the stick stayed straight and untwisted. Then I welded those two cuts shut. I repeated this process a couple of times until I got the degree of bending I wanted. I spent a little time with the grinder, making the welds look pretty, then I filled in the really low spots with JB Weld, but Bondo or any other type of filler would have worked just as well. Then I primed and repainted the stick. Stick
Grip
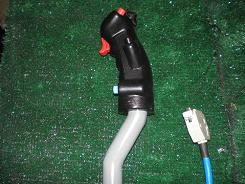
Fitting the infinity grip was straight forward. The hardest part was putting the grip back together onto the stick. The switches kept falling out of the slots, and the wires kept moving in the way. But with a little patience, I got it all to fit. I chose to use a d-sub fitting for the electrical connections, as this seemed to be the smallest connector that would handle enough wires. I haven’t assigned all the switches yet, but I do have the trim and autopilot disengage on the front control stick. I connected every wire to the d-sub, so adding more functions in the future will be a lot easier—I won’t have to pull the stick apart, or do any more wiring on it. I’ll only have to run the circuits to the d-sub.Return from Front Control Stick to Other Mods Return from Front Control Stick to Kit Plane Advice Home |
 Most
of us figure out
pretty quickly that the front control
stick needs to be cut to fit in the RV-8.

 I
waited until after the
bending was complete before cutting
and fitting the stick grip.