
Hanging FlapsHanging flaps was not a hard process, but it took a lot of time. The big steps, fitting the flap to the fuselage and installing the pushrod, were both a series of installing, measuring, removing, trimming and repeating. But I would rather take it slow and end up with a good fit than move too fast and end up with a big gap because I removed too much metal.
To begin the process of hanging flaps, I set the ailerons in the trail position by installing the W-730 bellcrank jig. I also checked that the tooling holes in the wing tip and aileron lined up. Then I installed the flaps, sliding the hinge pin in from the inboard side of the flap. An alternate method that might be a little easier if you have help is to make two small hinge pins. Have your help hold one end of the flap and slide the pin in a few inches while you do the same on the other end. Since you just need the flap in position to check for fit, you really don’t need to install the entire hinge pin.
I
did most of the
trimming with a cutoff disk on an angle
grinder. I then
polished
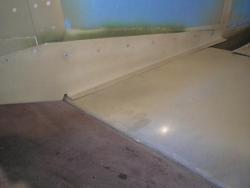
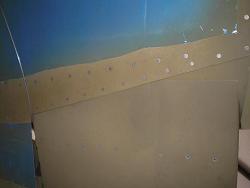
Now mark and trim the bottom flap skin to match the F-826 and F-827 skins. I used a cutoff wheel with the flap on the bench to initially cut the large piece off. Then I cleaned up the edge with the scotchbrite wheel. I did the final trimming to make the edge parallel to the F-826 and F-827 with the flap installed, using just the scotchbrite pad. This made hanging flaps go a lot faster. If you haven’t already set the ailerons to neutral, you will need to do it now before you install the pushrod.
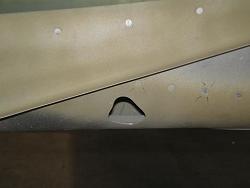
I used a rotary file bit on the angle grinder to do most of the trimming in the holes. Then I used a piece of emery cloth to smooth and dress the edges. I repeated this process on one side until I could move the flap assembly through its full range of motion. Then I did the other side of the airplane. Then I ran the motor until the flap was full up, and adjusted the up stop to get the flaps to just touch the belly skins. As I ran the flaps up, I moved very slowly, ensuring the pushrod didn’t scrape anywhere. I actually had one spot that I had to trim again. I wanted to run the flaps full up and down a few times to check everything, but I wasn’t sure how many times in a row I could run the flaps without overheating the motor. So I only ran them one direction and checked for fit. In the full up position, I checked that the flap was flush in trail with the aileron and flat on the bottom of the fuselage, and full down, I checked that it was between 40 - 45°. Then I waited a little while before I ran them the other way.
Return from Hanging Flaps to Final Assembly Return from Hanging Flaps to Kit Plane Advice Home |
 I started this step
by
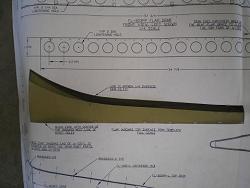
marking and trimming the top skin
with the cutout template from the plans.
 the edge with the
course scotchbrite pad on the grinder.
 Trim just enough
to keep
the top skin of the flap from
scraping the side while the bottom skin of the flap lightly touches the
bottom
fuselage skin.
 I
started with the pushrod the length called for in the
plans.