Jigs
I built jigs for my fuselage, tail and wing
kits, wing tanks, ailerons, and flaps while building my RV-8.
Here's how I did it. You should be able to use some
of the ideas here.
Fuselage
It's
great to not have to build
one, but I ended up
having to
build two due to moving. It was a pain to ensure everything
was
level, plumb and true before drilling and riveting. But all
the
hard work paid off. I riveted the skins on from the tail to
the
front. There were two holes on
either side, one in the F-815A Seat Rib and one in the F-823PP
Skin. You used these holes to ensure your fuselage was not
lopsided. The plans said the holes should be close together,
but
didn’t need to match perfectly. I was happy when after two
jigs,
the holes lined up and I could insert a cleco in them.
 The
good news was that after the fuselage came off, I covered
the top with wood, and had a big workbench. Lots of
space
to spread out. The
good news was that after the fuselage came off, I covered
the top with wood, and had a big workbench. Lots of
space
to spread out.
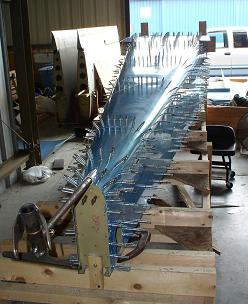
Here’s a picture of the “porcupine”
in North Carolina. Mine was the second fuselage built in this
rig; my buddy
and
I both used it for our RV-8s. Because we moved it around the
uneven hanger floor, it wasn’t completely level. I used shims
below the F-887 on each cross member to ensure everything was correct.
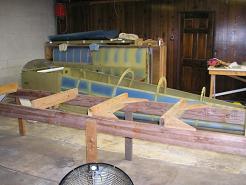
This
picture was taken the happy day I permanently removed the riveted
fuselage. When I built this jig, I bolted it to the floor
so it
wouldn’t move. Then I used a planner to get each of the cross
members perfectly level so I didn’t have to mess with shims.
When
I moved again, I passed this one on to another EAA member who was ready
to start his RV-8 fuselage.
Tail
and Wing
I
know the new directions don’t require or even suggest building a tail
jig. For the older kit, we made a simple one that we used for
the tail and then modified for the wings, so it really wasn’t a lot of
wasted effort.
It
was a simple H-shape, which you could build out of whatever materials
you had
handy. I used wood because I could easily drill holes
anywhere I needed
them. The only “critical” piece was the horizontal
cross-member. You want to make sure it is flat with no warp
or
twist.
Unfortunately I didn’t take any good pictures
as I built my tail
kit. I was too busy building to stop and take
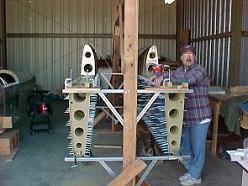
pictures. But you can see the jig I used for the wings in
this
picture. The uprights are the same ones from my tail kit;
I
just changed the horizontal parts.
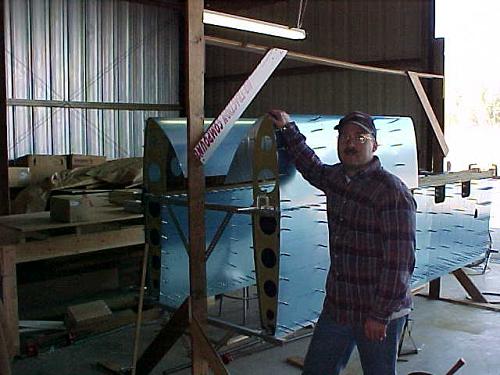
Make
yours look like this and you can use it on all the tail parts,
and
with minor mods, again for the wings.
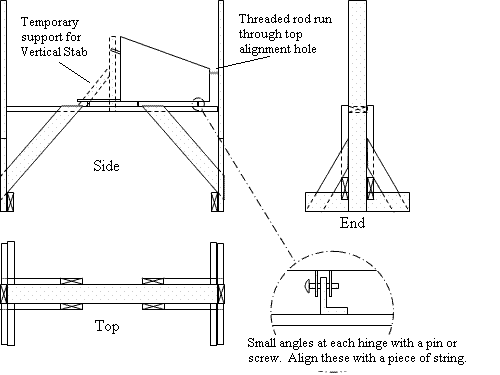
None
of the measurements are critical. Place the horizontal cross
member at a height that is comfortable for you to work over.
Ensure it is long enough to hold the entire horizontal stab
between the uprights (102in minimum).
Drawing 12A
shows the wing
jigs. The measurement is 114” across, so if you are going to
build the jig to help with the empennage, you might as well build it
114” from the beginning. Then when you are ready for the wings, just
raise the horizontal bar up to the top, out of the way.
I
added
the vertical stab to the picture so you could see how the parts were
held in place. The main spars were held in position with
some
angles and screws run through the hinge-bolt holes. You can
align
these angles by running a piece of string through the holes you drill
in each. Make sure they are aligned and level. Then
hold
the piece upright with temporary support and threaded rods through the
alignment holes. You can make it plumb by using a plumb bob
at
the alignment holes., or putting a short screw into each alignment hole
and setting a level against them.
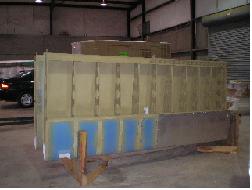
 You
can see in the picture that I used some angle iron for the cross
members that actually hold the wings. Van’s Drawing 12A shows
the
wing right next to the upright. If you are going
to
build one wing at a time, this is OK. If you are
going to
build them both at the same time, push the wing out some
more.
Leave yourself enough room to get between the wings for clecoing,
drilling and riveting the top skins. I suggest putting the
top
skin in. Since you will be riveting it on first, it leaves
the
open bottom side easy to access for the rest of the building process. You
can see in the picture that I used some angle iron for the cross
members that actually hold the wings. Van’s Drawing 12A shows
the
wing right next to the upright. If you are going
to
build one wing at a time, this is OK. If you are
going to
build them both at the same time, push the wing out some
more.
Leave yourself enough room to get between the wings for clecoing,
drilling and riveting the top skins. I suggest putting the
top
skin in. Since you will be riveting it on first, it leaves
the
open bottom side easy to access for the rest of the building process.
 Wing
Cradle Wing
Cradle
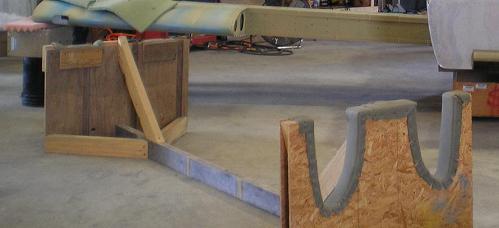
This
is the cradle I used. It was actually built by another EAA
Chapter member. They are a great source for used
stuff.
After his wings were mounted, he didn’t need the cradle
anymore.
Thanks Roy!
Tank, Aileron
and Flaps
You
will actually only need two jigs; one for the tanks, and one for both
the flaps and ailerons.
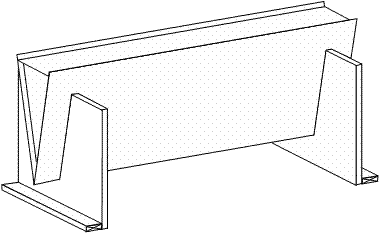
Some
pieces of wood with a “V” cut in them used to be shipped with the
kit. This was screwed and clamped so the parts could rest in
the
“V” like a cradle.
 This
will hold everything sturdy while you rivet, and ensure there is no
twist or warp built into the parts. The exact shape isn’t
necessary, as long as the part can slip into the slot and be cradled
securely. Put some padding on the inside of the “V” to keep
the
part from getting marred. When you are clamping and working,
make
sure you have the wood lined up with a rib. You wouldn’t want
to
dent your skin. This
will hold everything sturdy while you rivet, and ensure there is no
twist or warp built into the parts. The exact shape isn’t
necessary, as long as the part can slip into the slot and be cradled
securely. Put some padding on the inside of the “V” to keep
the
part from getting marred. When you are clamping and working,
make
sure you have the wood lined up with a rib. You wouldn’t want
to
dent your skin.
The wing jig looks like the drawing,
except
instead of cutting a “V”, cut a curve the shape of the tank, just like
you did for the cradle.
I drew a centerline down
from the bottom
of the “V” and tank curve. I then drew a line across my
workbench. I lined up the jigs using these lines, spacing
them so
they aligned with support ribs. Then I clamped the 2x4 lip to
the
bench, and was ready to rivet.
Trailing Edges
I also built a jig for bending of trailing edges,
which I describe here in Working
with Aluminum Skins.
Return
from Jigs
to Tools and Tips
Return
from Jigs
to Kit Plane Advice Home
|


 The
good news was that after the fuselage came off, I covered
the top with wood, and had a big workbench. Lots of
space
to spread out.


 You
can see in the picture that I used some angle iron for the cross
members that actually hold the wings. Van’s Drawing 12A shows
the
wing right next to the upright. If you are going
to
build one wing at a time, this is OK. If you are
going to
build them both at the same time, push the wing out some
more.
Leave yourself enough room to get between the wings for clecoing,
drilling and riveting the top skins. I suggest putting the
top
skin in. Since you will be riveting it on first, it leaves
the
open bottom side easy to access for the rest of the building process.

 This
will hold everything sturdy while you rivet, and ensure there is no
twist or warp built into the parts. The exact shape isn’t
necessary, as long as the part can slip into the slot and be cradled
securely. Put some padding on the inside of the “V” to keep
the
part from getting marred. When you are clamping and working,
make
sure you have the wood lined up with a rib. You wouldn’t want
to
dent your skin.