Final Kit Plane Certification
and Inspection

I found that the prep for the final kit
plane certification was more difficult than the the inspection
itself.
You have to fill out several forms, calculate weight and
balance,
prepare your airplane, and make arrangements for the actual inspection.
Paperwork
All of these documents need to
be completed, and ready for the inspector, in order to complete your
final kit plane certification. The 8130-12 is the
only one that you can't completely finish yourself, because that one
needs to be notarized.
FAA
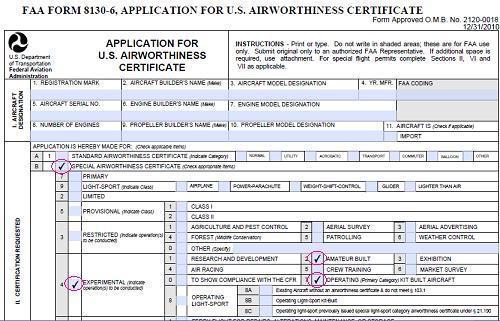
Form 8130-6

This form was pretty straightforward.
Again, it is important to make sure all the information on each form matches all the
other forms. There are several boxes you should
check. I’ve marked them with the little red circles in the
picture. Download an FAA 8130-6 here(Adobe
pdf file).
FAA
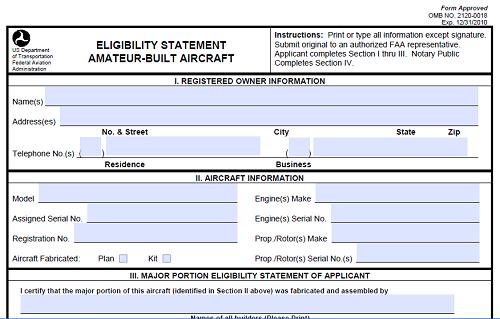
Form 8130-12

Don’t forget to get this one notarized. Download an FAA 8130-12 here Adobe pdf file).
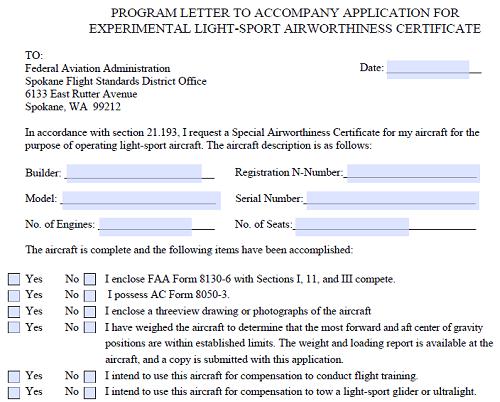
Program
Letter

You can ask for whatever Phase I flight test area
you want. I asked for a 25NM circle around the airport, and
had no trouble. I have also heard guys specify the corners of
the area they want, using airports for the corners. Download a Program Letter here.
(Adobe pdf file).
Picture
or 3-view drawing - You have to have
either a picture of your airplane, or the three view
drawings, on hand for this kit plane certification. Ask your inspector which he prefers.
Weight
and Balance – see my article on how
to do the Weight and Balance calculations.
Condition
Inspection – You can use whatever
inspection checklist you want. I looked on line and found
several checklists from other RV-8 builders.
Aircraft
Maintenance Records
Usually this is an airframe logbook and an
engine/prop
logbook. The following entry is required in the airframe
logbook for your final kit plane certification:
“I certify this aircraft has been inspected in
accordance with the scope and detail of Appendix D to Part 43 and has
been found to be in a condition for safe operation.”
Prepare Your
Aircraft
The inspector will be looking specifically for each of these items
to be correct before he'll sign off on your kit plane
certification.
N-Number
Most of us can get away with using the 3”
letters. You only have to use the 12” letters if your
cruising speed will be above 180 Knots CAS. There are very
specific requirements for the lettering. According to FAR
45.29, “Characters must be two-thirds as wide as they are high, except
the number "1", which must be one-sixth as wide as it is high, and the
letters "M" and "W" which may be as wide as they are high. Characters
must be formed by solid lines one-sixth as thick as the character is
high… The space between each character may not be less than one-fourth
of the character width.”
EXPERIMENTAL
According to FAR 4.23, “the operator shall also
display on that aircraft near each entrance to the cabin or cockpit, in
letters not less than 2 inches nor more than 6 inches in height, the
words "limited," "restricted," "experimental," or "provisional
airworthiness," as the case may be.”
Label
the Fuel Tanks
You should mark the tanks with capacity and min
fuel grade.
Passenger
Warning
You have to use these exact words, and they must
be in full view of all occupants.
“Passenger Warning – This aircraft is
amateur-built and does not
comply with federal safety regulations for standard aircraft.”
Data
Plate
FAR 45-11 and 45-13 require a “fireproof plate
with [builder’s name, model designation and serial number] marked on it
by etching, stamping, engraving, or other approved method of fireproof
marking. The identification plate for aircraft must be secured in such
a manner that it will not likely be defaced or removed during normal
service, or lost or destroyed in an accident… The aircraft
identification plate must be secured to the aircraft fuselage exterior
so that it is legible to a person on the ground, and must be either
adjacent to and aft of the rear-most entrance door or on the fuselage
surface near the tail surfaces.”
Make sure this data matches exactly the data on
your FAA form 8130-6.
Emergency
Locator Transmitter (ELT)
All fixed wing airplanes with more than one seat
have to have an ELT installed.
Paperwork
in the plane
This paperwork must be in the aircraft at all
times -- not just for the inspection, but the entire time you are
operating the aircraft. It's like the requirement to keep
registration and proof of insurance in your car. You can have
these documents in any safe location within the aircraft. I
have mine in a document protector behind the seat.
- FAA Form 8050-3, Aircraft Registration
Certificate
– The FAA will send you this after assigning you an N-number.
- Complete weight and balance paperwork – Talk to
your inspector to find out exactly what calculations he wants you to
make.
Cockpit
Markings
All controls, switches and knobs need
labels. For example:
- Ignition – On/Off
- Fuel selector – Left/Right/Off
- Airspeed indicator – White, red and green marks
Other
Prep
- Open all inspection panels/fairings
- Re-check all the flight controls and ensure
everything works properly
- Have your builder log and photos ready for
review
My Inspection
As I said before, the preparation was a lot harder
than the actual kit plane certification inspection. My DAR showed up and gave the airplane
the once over from 10 feet. He walked all the way around and
I think looked at the big picture. Then he moved closer and
looked at the workmanship of the airframe itself. He ran his
hand over a few of the rivet lines, then leaned into the cockpit and
looked back into the tail. I think he was looking at the back
sides of the rivets and probably at the edge distance too.
Then he moved every control surface to check full
range of motion and no binding. He spent a few more minutes
looking into the cockpit. I let him look without bothering
him, but I think he probably looked all the controls over.
I have an alternative engine installed, so he
didn’t spend a lot of time looking the engine over. He did
give it a look though to make sure there wasn’t anything glaringly
wrong.
He found four things that I needed to fix.
1. I had assumed the aileron pins wouldn’t slip
outboard because the bracket was in the way. But they had, so
I needed to crimp the outside edge of the hinge.
2.One nut on a brake line had a little leak, a
quarter turn fixed it on the spot.
3.The elevator control rod was bending at the
bellcrank when I went full left and down. This took a little
time fine adjusting the angle of the rod end.
4.The flap pushrods were not binding, but had no
slack and couldn’t wiggle at all when the flaps were
extended. It turned out that the weldment was pinching the
rod end when I tightened the bolt. A couple of washers
between the rod ends and the weldment fixed the problem.
He took some time to look through all the pictures
of the build, and glanced at my log book. Then we went in the
office and did the final kit plane certification paperwork.
Return
from Kit Plane
Certification to Experimental Aircraft Paperwork
Return
from Kit Plane
Certification to Kit
Plane Advice Home
|


