
Kitplane TransportorJed Clampett meets Vans Aircraft I’ve had to do a complete cross country
kitplane transport
twice.
I guess that’s one of the hazards of being in the military.
Here's how I did it. First
move: North Carolina to Pensacola I
kept the crates Vans shipped everything in and used them for my first
kitplane transport. The vertical stab, rudder, elevators,
flaps and
ailerons
all fit into the crate Vans shipped the wing kit in. I used
old
blankets for padding between the parts. Hurricane
Ivan 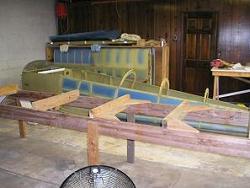 You
can see the wings
still in the crate in
my first
shop in Pensacola. This was before Hurricane Ivan wrecked
it. Actually, Ivan trashed everything around my shop, but
left it
standing -- leaking, but standing. The rooms on either side
were
completely destroyed and their ceilings caved in. The entire
front half of the hanger was gone, you can see the bent rafters lying
on the concrete. The remains of the T-hangers are on either
side
of what’s left of my hanger. You
can see the wings
still in the crate in
my first
shop in Pensacola. This was before Hurricane Ivan wrecked
it. Actually, Ivan trashed everything around my shop, but
left it
standing -- leaking, but standing. The rooms on either side
were
completely destroyed and their ceilings caved in. The entire
front half of the hanger was gone, you can see the bent rafters lying
on the concrete. The remains of the T-hangers are on either
side
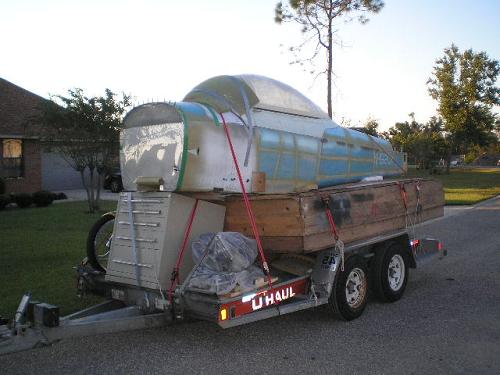
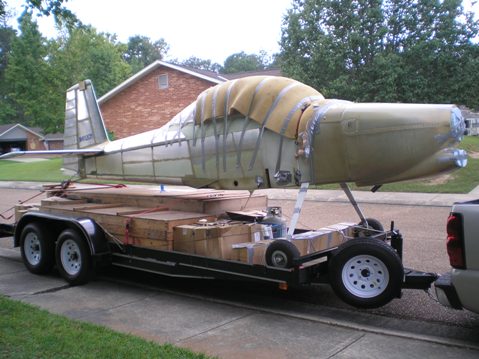
of what’s left of my hanger.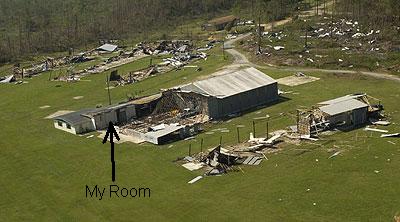 Second Move: Pensacola to Louisiana (2006) My second kitplane transport was a little more difficult. By this time the plane took up a lot of space. Again, everything went into the crates, then I packed everything (plus my completed kit motorcycle project) onto a trailer for carrying cars. The crate with the empennage went on the bottom, between the tracks a car would normally drive on. The wings went on next, and the fuselage topped it off. That’s my toolbox and engine on the front. You can just see the front tire of my bike poking out. The small fuselage kit crate was behind it. If you look real close, you can see the horizontal stab, wrapped in foam and tucked under the wing crate. The entire kit, plus my bike, fit on the trailer.
I can hear
the banjo.
"Y'all come back now, ya hear?"
Third Move: Louisiana to North Carolina (2009) It was time to move again, and the engine wasn’t running smoothly. So I had the choice of working feverishly and hoping I found the problem, or knocking-it-off, pulling the wings, and trailering the plane to our new home. I opted to trailer the plan. My wife noticed that when I have a deadline, building the plane becomes too much like a job, and less like fun. Plus I didn’t want to get rushed and make a stupid (fatal) mistake. So I spent a few days at the airport getting ready for my third, and hopefully last, kitplane transport. I removing the ailerons, flaps, wings, and prop. I put the ailerons, flaps and wingtips in the smaller crate on the trailer. The wings went back into the large crate. But this time, the pitot tube was installed and made the wing too fat to fit in the crate. Instead of unriveting the pitot tube, I opted to cut a hole in the top of the crate. Then I wrapped the pitot tube with plastic and covered that with tape. I made some foam covers to fill the holes in the cowling, and covered the canopy with plastic and foam. I started by washing the canopy real well, and then covered it with plastic wrap. Finally I taped foam on top of all that. I figured the plastic wrap would protect the canopy from getting rubbed and scratched by the foam, and the foam would protect it from rocks on the trip. You can see on the tail the “keeper” I made to hold the rudder in the streamlined position. I copied this idea from the “donuts” we used on some of the jets I have flown. I cut two pieces of plywood into about 8 inch squares. Then I cut two pieces of soft foam to match, and drilled a hole through the center of all four pieces. I used a piece of threaded rod, nuts and washers to hold it all together. I put a washer and nut on one end of the threaded rod, then slipped the plywood and then foam on. I then pushed the threaded rod through the space between the rudder and the vertical stab. It only fits in the lower leading corner of the rudder, I can’t slip it up and out between the rudder and stab. Then on the other side of the stab, I put foam, plywood, washer and nut onto the threaded rod. I tightened the whole thing by just squeezing the entire assembly with one hand and tightening the nut with the other, no tools required. I also made one of these for the elevators. It fits in the aft corner of the horizontal stab, between the stab and the elevator. Everything made the trip with no problems. The hardest part of this kitplane transport was removing the duct tape residue from the sides of the plane when the move was complete.
Final Move? Hopefully this really is the last ground move for the plane. I really want to fly it to the next destination. It's late 2009, and as soon as I get the engine running properly, I'll be flying. No more kitplane transport for me! Through all three
moves, packing up
for four hurricanes, and actually getting hit by one, the parts have
all made it fine. Van’s crates worked perfectly. Return from Kitplane Transport to Tools and Tips Return from Kitplane Transport to Kit Plane Advice Home |
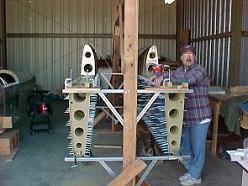 I started
building while I was
stationed in North Carolina. While I was there, I finished
the
tail and wing kits, and started on the fuselage. I had
everything
drilled on the jig, but only the floor skeleton and bulkheads
riveted. So when it was moving time, everything laid pretty
flat.