

Fitting the Landing GearYou do the fitting and drilling of the landing gear before you finish installing the bottom skins. This makes it a lot easier to get to all the bolts and nuts. After the skins are installed, it is difficult to get to the ¼ inch bolts that hold the U-806-1 and U-805-1 wear plates. You can still get to them, it is just hard. Aligning
I taped a plumb line as close to the fuselage as I could get it on both legs for the inside line (A). I taped the outside line to the outboard leading edge corner of the landing gear leg right next to the axle bolt holes (B). I wanted to get these two lines as far outboard as possible to minimize any error. If they are closer to the centerline of the fuselage, a 1/8” error when aligning the four plumb lines equates to a bigger alignment error than the same 1/8” measurement taken farther outboard.
I then took two car jacks and tied a line between them, and used that to align the four plumb lines. I put the jacks just outboard of the outer lines (B), and moved them until the horizontal line just touched the front of the inboard lines (A). Then I measured the distance from the outer lines (B) to the horizontal line. From here is was a matter of making a small correction to a leg, then moving the jacks until the inner lines (A) both just touched the horizontal line and the measurements from the outer lines (B) to the horizontal line matched.
After I had the two gear legs lined up, I measured from the outside plumb lines (B) to the F-812 bulkhead. I tried measuring from plumb line to the plumb, but everything kept moving too much. So I made a mark on the floor at the F-812 plumb line. Then I used a tape measure to measure to the outer two lines on the gear legs. I divided the total difference in the two measurements in half. I moved the leg that was farther forward aft by half the measurement, and moved the aft leg forward by half the measurement. I then started the entire process over, aligning the legs to the horizontal line, then re-measuring to the mark on the floor. Don’t let the fuselage move while you do this, or your F-812 mark on the floor will no longer be accurate.
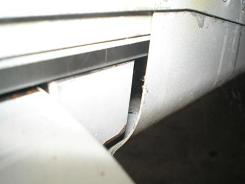 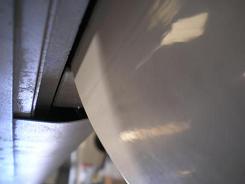 Start by putting temporary bolts back into the 3/8, 5/16, and 7/16 holes to align the U-805-1 and U-806-1 wear plates with the holes in the WD-813s and WD-822s. Bolt the wear plates with the AN4 bolts. Remove the temporary 3/8, 5/16 and 7/16 bolts. Now that you have finished the bottom ¾ of the fuselage, “the canoe” as my wife called it, you are ready to install the interior.
Return from Fitting Landing Gear to Fuselage Return from Fitting Landing Gear to Kit Plane Advice Home |
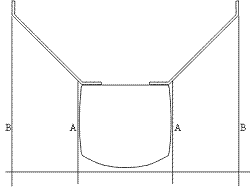 I
made sure the 7/16 bolt in each
gear leg was tight enough
to hold the leg steady and in position, but still loose enough that I
could
move the leg with a little effort.
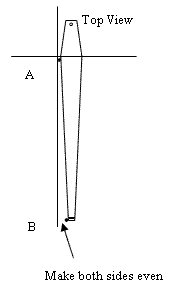 It is also important to
make sure the
two outboard lines are
at the same place on the legs.
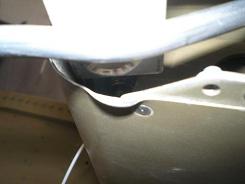 After
all the holes are drilled, and
all the parts deburred
and primed, I would permanently install the U-805-1 and U-806-1 wear
plates
with the four AN4-7 bolts before you rivet on the F-850 and F-851 skins.