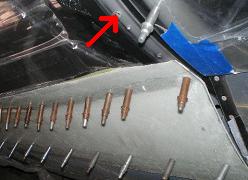

Fitting the Plexiglass BubbleFor me, fitting the plexiglass bubble to my airplane was about removing the extra forming material, cutting the bubble and polishing the edges, and drilling holes. I had problems with the last step. Here's how I did it. I started fitting the plexiglass bubble by removing all of the extra lip left from forming. Then for each successive cut I removed only ¼” at a time. It took a lot of cuts, but I was certain I wouldn’t remove too much material this way. I initially removed front and back material, and eventually started on the sides too. I used a cutoff wheel and scotchbrite pad on the angle grinder for all the straight cuts, and my Dremel tool with a sanding disk for the notches. I found drawing some centerlines helped with the progressive fittings. I made a line 3 ¼” aft of the F-866B bulkhead with a mark on the center of the front skin. Then I made a corresponding line on the center of the front of the canopy bubble. I also made a line on the aft center of the bubble. I didn’t need an aft centerline on the fuselage; I just used the rail to center the line. These lines helped me set the canopy at the same spot every time I fit it to the frame. I almost removed too much from the front. I was surprised by how much the front was lifted up when I pulled the sides in to touch the rails. But because I had taken it slow and only removed a little at a time, My final gap at the front was only 1/8 inch. Cutting the Plexiglass Bubble I cut the bubble in two just like the directions say, using a piece of cardboard as a guide. It worked perfectly. After the cut, I polished all the edges completely smooth using progressively finer scotchbrite wheels and finished with sandpaper. I have an almost clear finish on the edges of the plexiglass bubble. This may be a little much, but I didn’t want to leave a scratch or tool mark that could later turn into a stress point and crack.
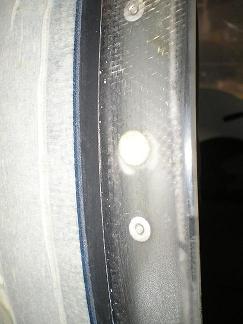
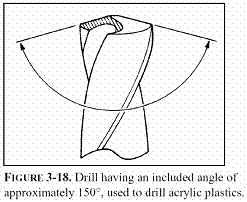
I asked and the supplier said they were the right bits, and even sent me another set just to be certain, but they looked just like the first ones. Still skeptical, I tried them on a piece of scrap plexiglass, and it drilled without cracking. So I took the plunge and drilled the first hole in the canopy – it cracked! I was pissed, but what to do now? I threw away these bits and got some that I was used to, and drilled all the other holes. Luckily
the first hole was in
the forward leading edge of the canopy where it will be below the
fiberglass
seam. I planned on
putting a thin layer
of fiberglass there and painting it anyway, so this would cover the bad
hole. I “fixed” the
hole by drilling it larger with
a good bit until all the cracks were removed.
Once I applied the thin strip of fiberglass, the repair was covered, and final painting will do the trick.   I drilled the frame according to the spacing in the plans, but then ended up with way too many holes and not near enough CS4-4 rivets. The plans call for 1 15/16” spacing all the way around the frame, for 44 holes total. I ended up with way more than 44 holes, and only 40 something CS4-4s. So I called Vans and told them about the discrepancy and asked which way was it supposed to be? They saw the problem, and said they would look into fixing the plans, and they sent me a bunch more CS4-4s. So I had enough rivets to install one in every hole. Now let's move to the next step of the canopy assembly process by working on the canopy skirt.
Return from Fitting the Plexiglass Bubble to Finishing Kit Return from Fitting the Plexiglass Bubble to Kit Plane Advice Home |
 The special plexiglass
bits that I
bought didn’t look like
the ones I was used to.